






Minecraft Tower Defense Online
Minecraft Tower Defense turns a block grid into a path-planning defense puzzle where you dig the enemy route, fold it through kill zones, place towers, upgrade traps, and protect your house.
Digging the Enemy Road
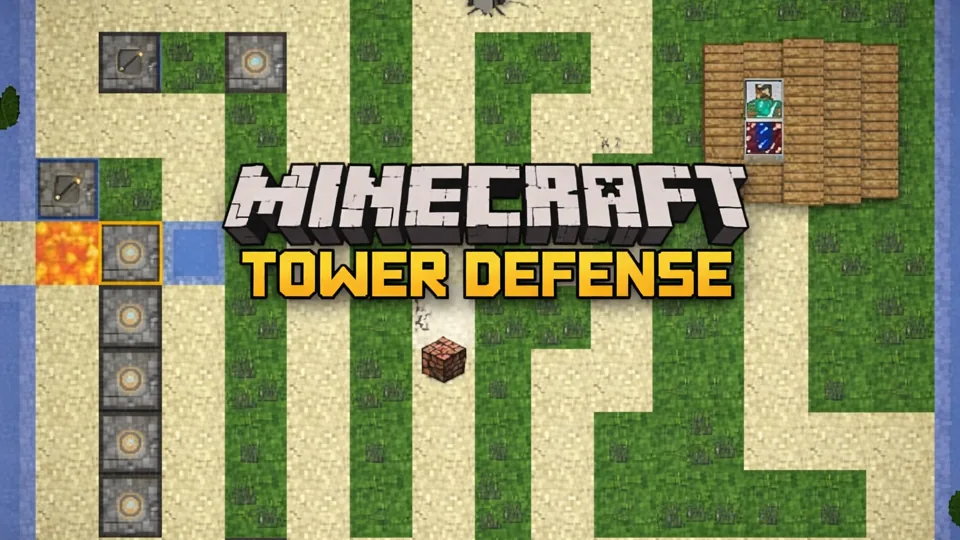
Minecraft Tower Defense is a fan-made Flash-era strategy game that turns Minecraft-style blocks into a maze-building defense puzzle. The important idea still feels distinctive: before towers matter, you dig the route that enemies will walk toward your house.
That one design choice changes the whole genre. In many tower defense games, the lane is fixed and the player reacts to it. In Minecraft Tower Defense, the lane is the first weapon. Click grid tiles to carve a path from the starting area to the house, but do it carefully because the route cannot cross over itself. A lazy straight road gives mobs a short victory. A compact winding route makes them spend more time under fire.
The game is not normal Minecraft. You are not mining for diamonds, building a personal shelter, or crafting gear for yourself. The Minecraft look supplies blocks, mobs, dispensers, traps, and familiar terrain language, but the skill test is geometry. Every tile you dig determines tower value later. Every corner can become a firing window. Every long straight segment can become a leak if enemies move through it too quickly.
The first lesson is simple: path length alone is not strategy. A route that wanders far away from your defenses can be long and still weak. A better route bends through a compact kill zone, returns near upgraded towers, and leaves room for traps where enemies slow down or cluster. The goal is not the longest possible road. The goal is the most useful exposure.
The best beginner route usually looks less like a road and more like a folded ribbon. Bring the path close to a tower pocket, turn it away, then bring it back near the same pocket from another side. That lets one upgraded dispenser fire across multiple parts of the route. Leave space beside bends before the wave starts, because a perfect path with no room for towers becomes a beautiful failure.
Creeper Coins, Bricks, and Defense Roles
Minecraft Tower Defense uses two resource roles that shape spending. Creeper Coins buy dispenser towers, while Bricks place traps. Both can be earned through digging and defeating mobs depending on the build. This split matters because towers and traps solve different problems. Towers create repeated damage from nearby positions. Traps change what happens on the road itself.
The dispenser set gives each tower a clear job: Basic Arrow, Fire Arrow, Snowball, and Explosive. Basic Arrow is reliable early damage. Fire Arrow adds burn pressure and works well on enemies that remain exposed for several tiles. Snowball slows mobs, which indirectly increases every other tower's value. Explosive dispensers punish groups and tight bends where multiple enemies overlap.
The trap set follows the same division of labor: Cactus, Water, Lava, and Webs. Cactus creates chip damage. Water slows movement. Lava punishes dense groups with stronger hazard damage. Webs hold or heavily slow mobs inside dangerous zones. A trap placed away from tower range only delays the inevitable. A trap placed inside overlapping coverage turns time into damage.
Upgrades are where the economy becomes interesting. Upgrading a tower that watches two or three route segments is better than buying a fresh weak tower with poor coverage. Range upgrades matter when a dispenser can reach multiple bends. Damage upgrades matter where enemies are slowed. Trap upgrades matter when the trap sits in the center of a kill zone. Spending should follow coverage, not impulse.
That is why early spending should be conservative. A Basic Arrow dispenser near the first useful bend may outperform a flashier purchase placed too far from the route. Snowball support becomes stronger after there is enough damage to exploit the slow. Explosive damage becomes stronger when enemies are already grouped. Water and webs become stronger when towers can fire into the delay. The order matters because every defense needs something else to make it efficient.
Map Difficulty and Wave Control
The map set gives the same digging rules different terrain problems: Survival Island, Dungeon, The Nether, and The End as a later challenge. Survival Island works as the baseline route test. Dungeon-style maps create tighter layouts and more mob variety. Nether-themed maps feel harsher because terrain and enemy pressure reduce comfortable placement.
Map changes should not erase the core rules. Every map still asks the same questions: where can the route bend, where can towers cover repeated segments, where can slow effects multiply damage, and where is the emergency fallback near the house? A player who memorizes one opening may struggle when the terrain changes. A player who understands exposure, slow, splash, and fallback coverage can adapt.
The enemy roster is why adaptation matters. Walkthrough footage and older writeups show waves including familiar Minecraft-style threats such as spiders, silverfish, slimes, skeletons, creepers, ghasts, and spider jockey-style surprises. These enemies do not all pressure the same part of the layout. Small fast mobs punish long gaps between damage zones. Dense groups reward lava, explosive dispensers, and tight bends. Tough or awkward late-wave enemies test whether the final fallback near the house is real or just decorative.
Wave tools such as speed up, skip, and pause are useful only when used honestly. Speed up is safe when the current wave is already controlled. Skip is useful when the defense is stable and the next wave can be handled with current resources. Pause is the strongest tool for planning because the first mistake in a maze-defense game often happens before enemies move: a bad route, bad tower angle, or rushed purchase.
The correct rhythm is dig, inspect, spend, test, and revise. After each wave, check where enemies spent time, where towers fired least, where leaks happened, and whether traps helped or merely delayed. A single well-placed slow trap can make three towers better. A single bad straight segment can waste every upgrade behind it.
Pause is the planning tool. Use it before committing to a new tower pocket, late-wave upgrade, or weak bend fix. Speed-up is the opposite: use it only when the defense has already solved the wave. Many failed runs happen because the player speeds through evidence.
Building Better Kill Zones
The best routes create repeated exposure. Imagine an upgraded dispenser sitting near a central bend. If the path passes that tower once, it gets normal value. If the path bends around it twice, the same tower fires for much longer. Add water or webs before the bend and the tower gains even more shots. Add explosive damage where enemies cluster and the bend becomes a kill zone instead of a decoration.
Slow before damage is usually stronger than slow after damage. If a mob is already leaving the danger area, slowing it late helps less. Place snowball effects, water, or webs before the strongest tower cluster so enemies enter the kill zone already delayed. Fire and explosive damage become more reliable when enemies spend extra time inside the affected area.
Keep a final fallback near the house. Even strong layouts leak when enemy health, speed, or wave density rises. A last bend with an upgraded tower and a slow trap can save lives that the main route failed to protect. This is especially important when a new map introduces mobs that move differently than expected.
Do not judge a defense only by the early waves. Early mobs mainly prove that the route is not completely broken. Mid-game waves expose weak slow placement. Later waves expose whether upgraded towers cover enough repeated road. If high-health enemies leak, the answer is usually stronger concentrated fire where enemies are already slowed, plus a serious final corner.
Three route mistakes cause most collapses. The first is the straight shortcut, where mobs reach the house before towers have enough firing time. The second is the isolated trap, where water, lava, cactus, or webs sit outside meaningful tower coverage. The third is the dead tower, where a dispenser watches only one small path segment and stops firing for most of the wave. Fixing those mistakes usually adds more power than buying one more random defense.
Minecraft Tower Defense keeps the action inside preparation. There is no manual sword fight, no shelter-building route, and no open mining economy. The result comes from the road, traps, dispensers, and upgrades either working together or fighting each other. A clean layout can make modest defenses look powerful; a careless layout can make expensive upgrades feel useless.
For a strong first run, make a compact winding path, leave tower pockets near bends, buy early arrow damage, add slow before the best coverage, and upgrade the defenses that see the most road. After a failed wave, do not blame the mobs first. Diagnose the geometry: path too short, tower range wasted, traps isolated, splash missing, fallback weak, or speed-up used too early. The cleaner the route, the more every Creeper Coin and Brick is worth.